
In scene two your character has a different jacket; in scene three, a different face. “Draw the same character” is rarely enough: the model needs an image to work from. In Vini Studio, save that reference in an Element and connect it to each new scene.
A character you don’t have to reinvent
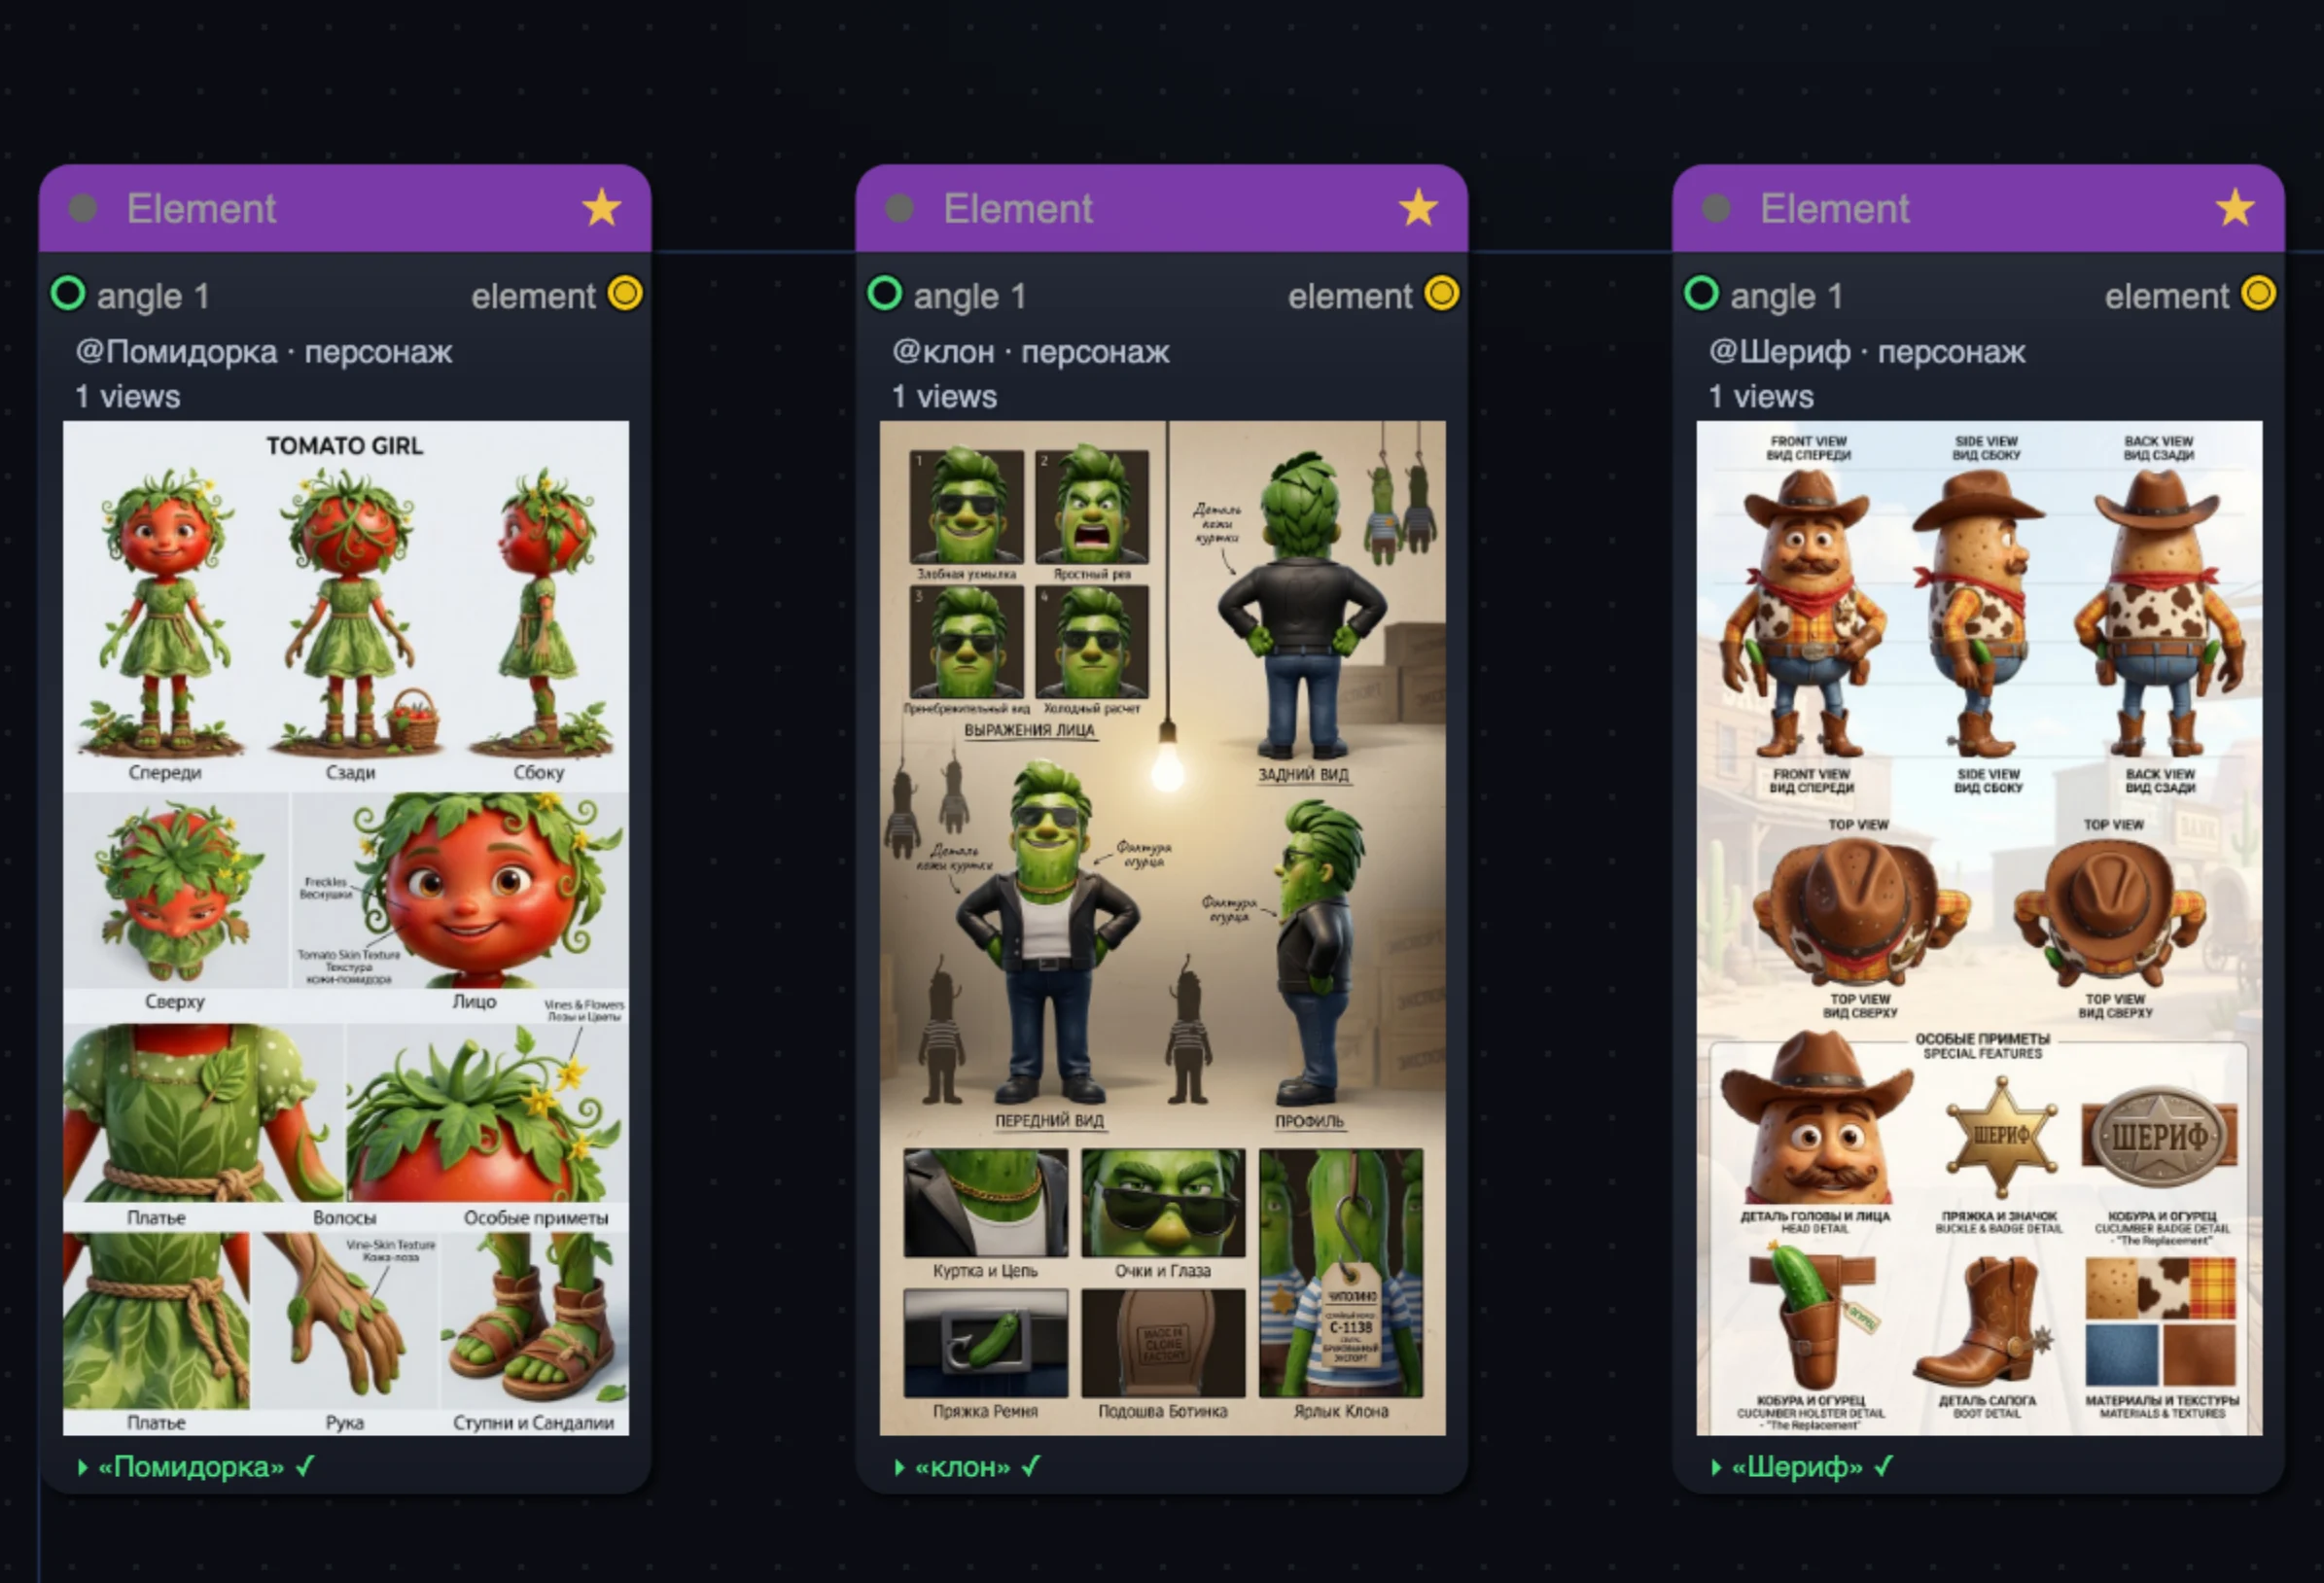
An Element is a saved character: its name, reference images, description and personality. You choose its appearance once, then reuse that visual guide across scenes. A reference is an image the model can work from — a portrait or a whole sheet of views and costume details.
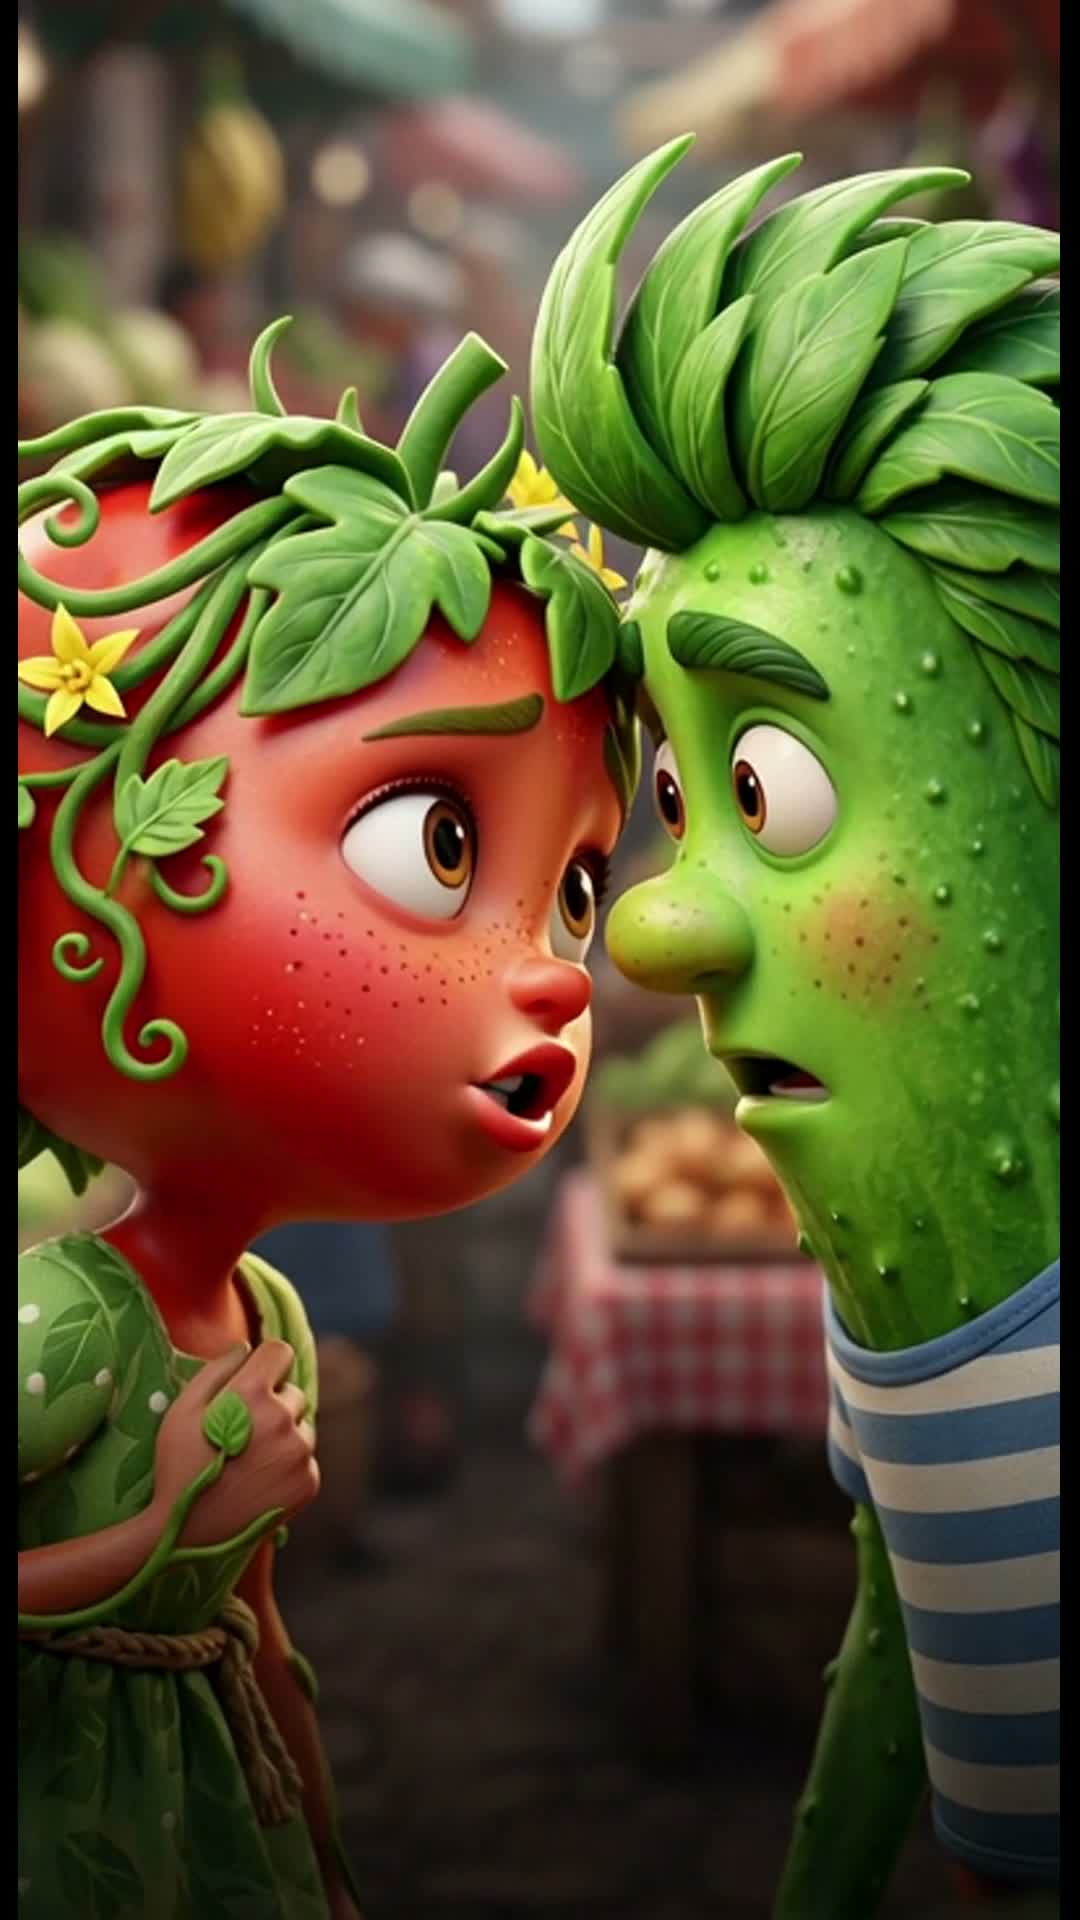
“The same guy in a cap” describes a type. For a new scene, the model chooses the face, colours and clothing details again, leaving a series full of look-alike strangers.
Each scene has the same visual reference. You change the action, setting and camera angle while the model receives the saved character as its guide.
What this changes when making a series
One character, different scenes.
Sheriff can stand by a house, walk through the market or talk to neighbours. Each frame receives the same Element with his face, hat and badge. You don’t have to describe every distinctive trait again in every prompt.
A new episode with a familiar cast.
Retrieve a saved Element from the library in your next project, along with its images and description. Continue the character’s story without spending generations on preparing its appearance again.
The scriptwriter knows who is in the scene.
A name, role, description and personality help the scriptwriter distinguish your characters. Tomato Girl has her own traits and behaviour; Sheriff has his. The Element passes those text details to the scriptwriter so the script is grounded in your cast.
The same idea works for objects and locations: save your character’s car, a recurring prop or a setting. The studio has three generators to prepare those references — one for characters, one for objects and one for locations. We’ll get to them after the example.
How this helps in a real series
In episode two of “Sheriff Potato”, I showed how I keep characters recognisable using references and distinctive traits. The video uses an earlier interface. Below, we’ll follow the same approach step by step in the current studio.
The author’s real experience: in episode one, the AI even gave the potato a cabbage hat. That is why we still review the results visually.
Three generators: choose what you want to keep
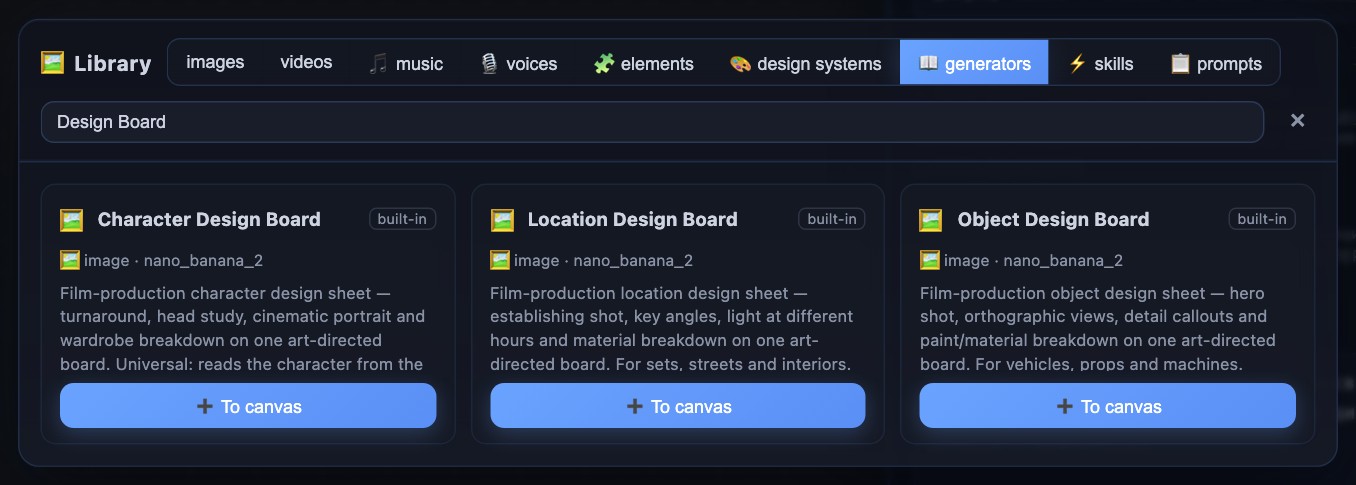
Each generator creates a single design sheet with several views of your subject. These are the exact names you’ll see in the library. For our character, choose the first one.
| Name in the library | What it prepares | Element role |
|---|---|---|
| Character Design Board | Character: views, face, clothing and costume details. | character |
| Object Design Board | Object, vehicle or prop: views, details and materials. | object |
| Location Design Board | Place: establishing shot, key angles, lighting and materials. | location |
Follow along with one character
Open the studio and create or choose a project. Have one image ready that clearly shows your character, its face and clothing. An existing AI character works. If you have no image yet, first create one with an “Image” node.
Click a screenshot to open it at full size.
1. Drop your character image onto the canvas
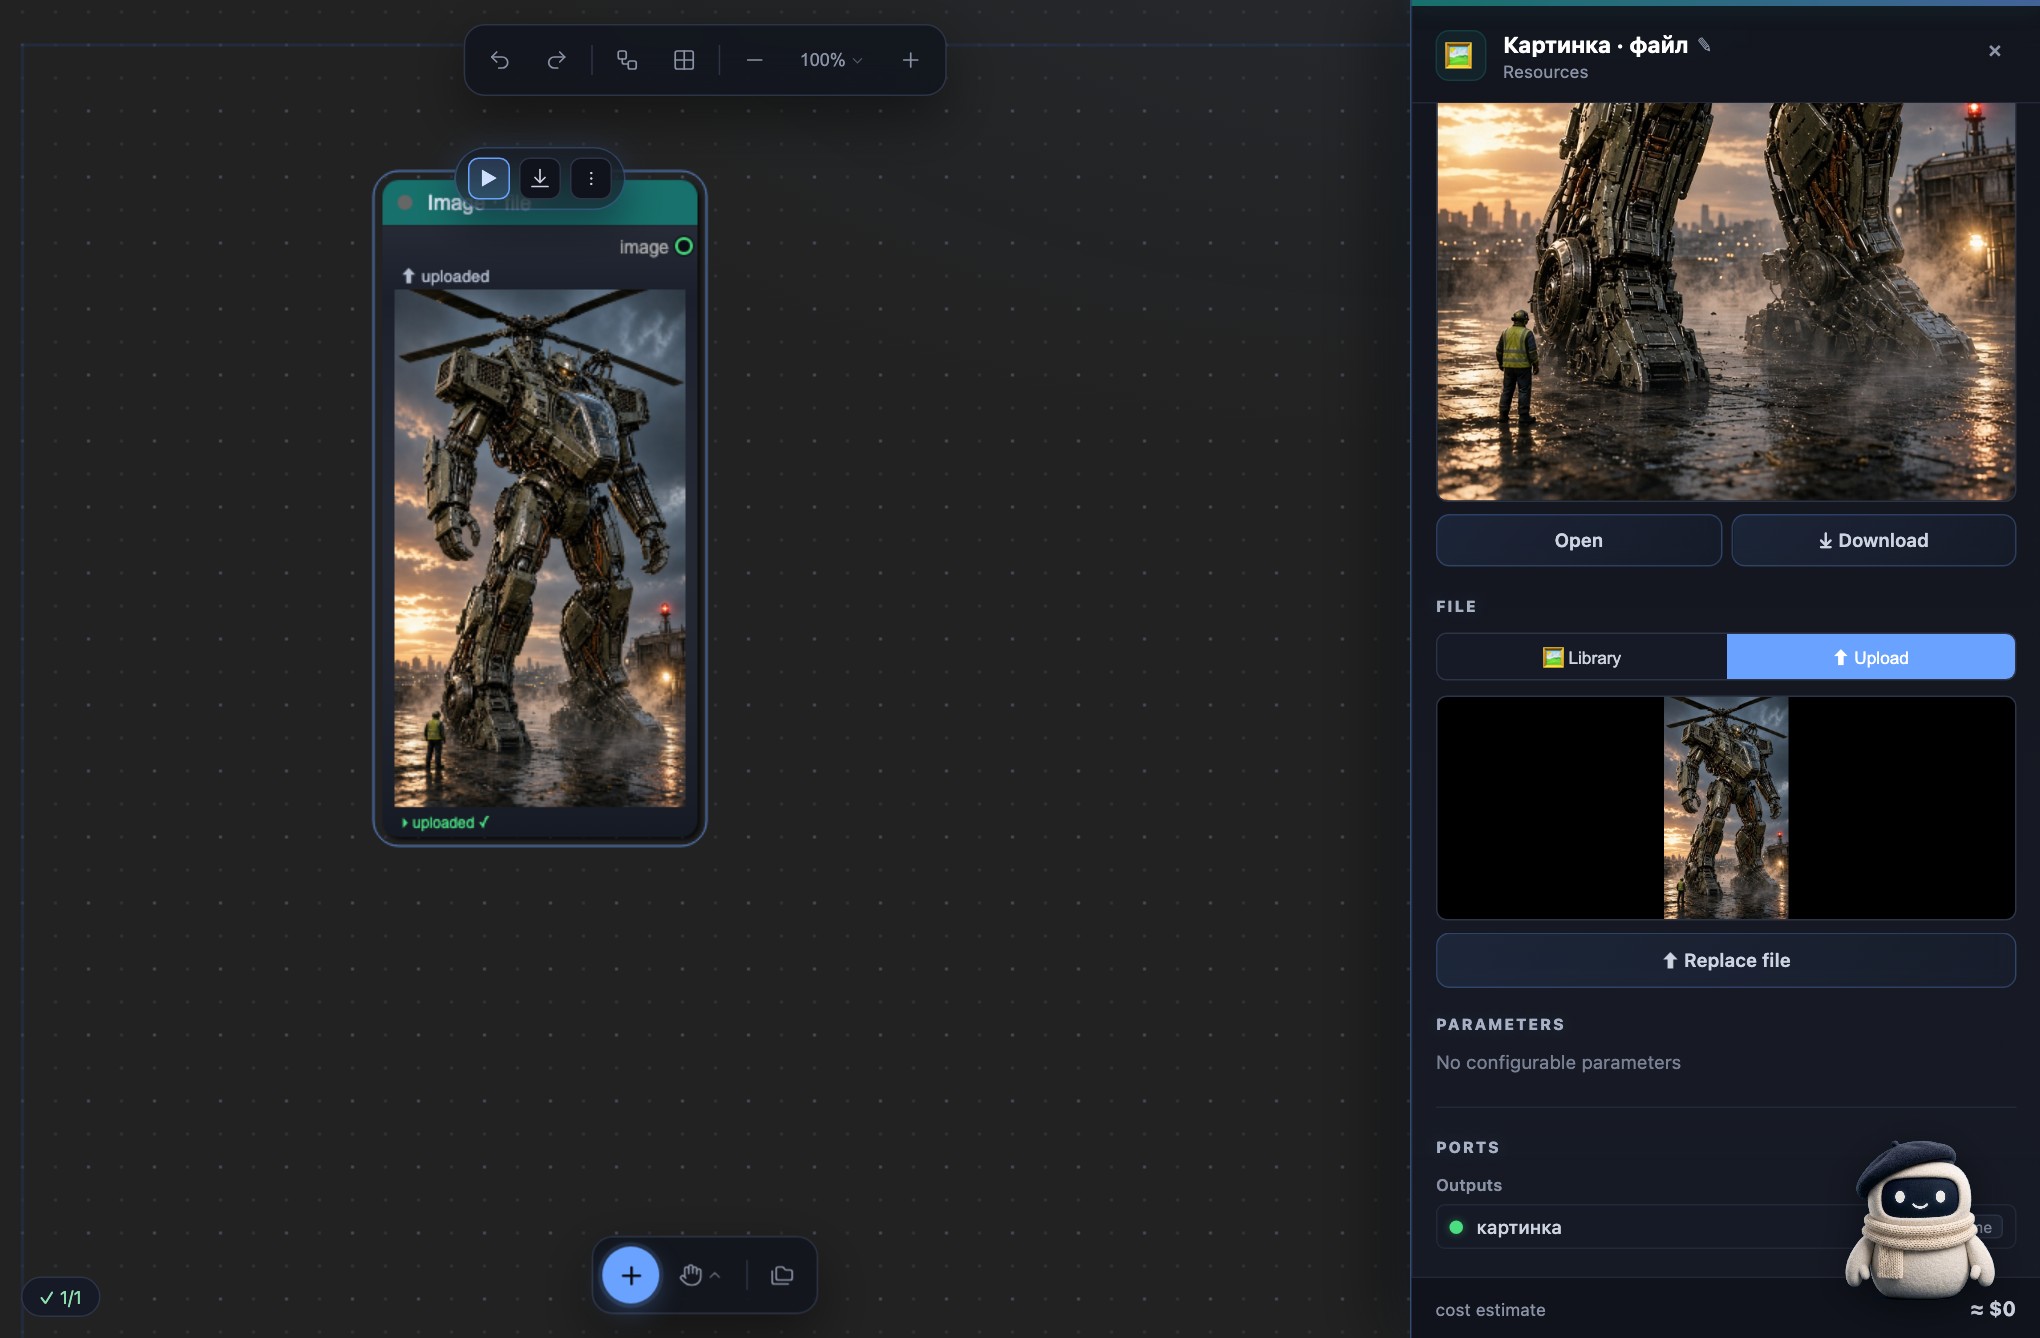
Drag the file from a folder on your computer into an empty area of the studio. An “Image · file” node appears with your image. A node is a card on the canvas; the round ports along its edges pass its result to other cards.
2. Add Character Design Board
Click the “Library” folder icon in the studio dock. Open “generators”, search for Design Board, then click “To canvas” on Character Design Board. For an object or place, choose the corresponding generator from the table above.
3. Connect the reference and generate a sheet
Drag from the file’s “image” output on the right to Character Design Board’s “image 1” input on the left. The preset already selects Nano Banana 2 and 16:9 — the format of the sheet of views.
Want to add a name, profession or personality? Use “+” to find “Text (input)”, enter your brief in “text”, then connect its “text” output to the generator’s “prompt” input. Keep the long Design Board instruction: your brief will accompany it.
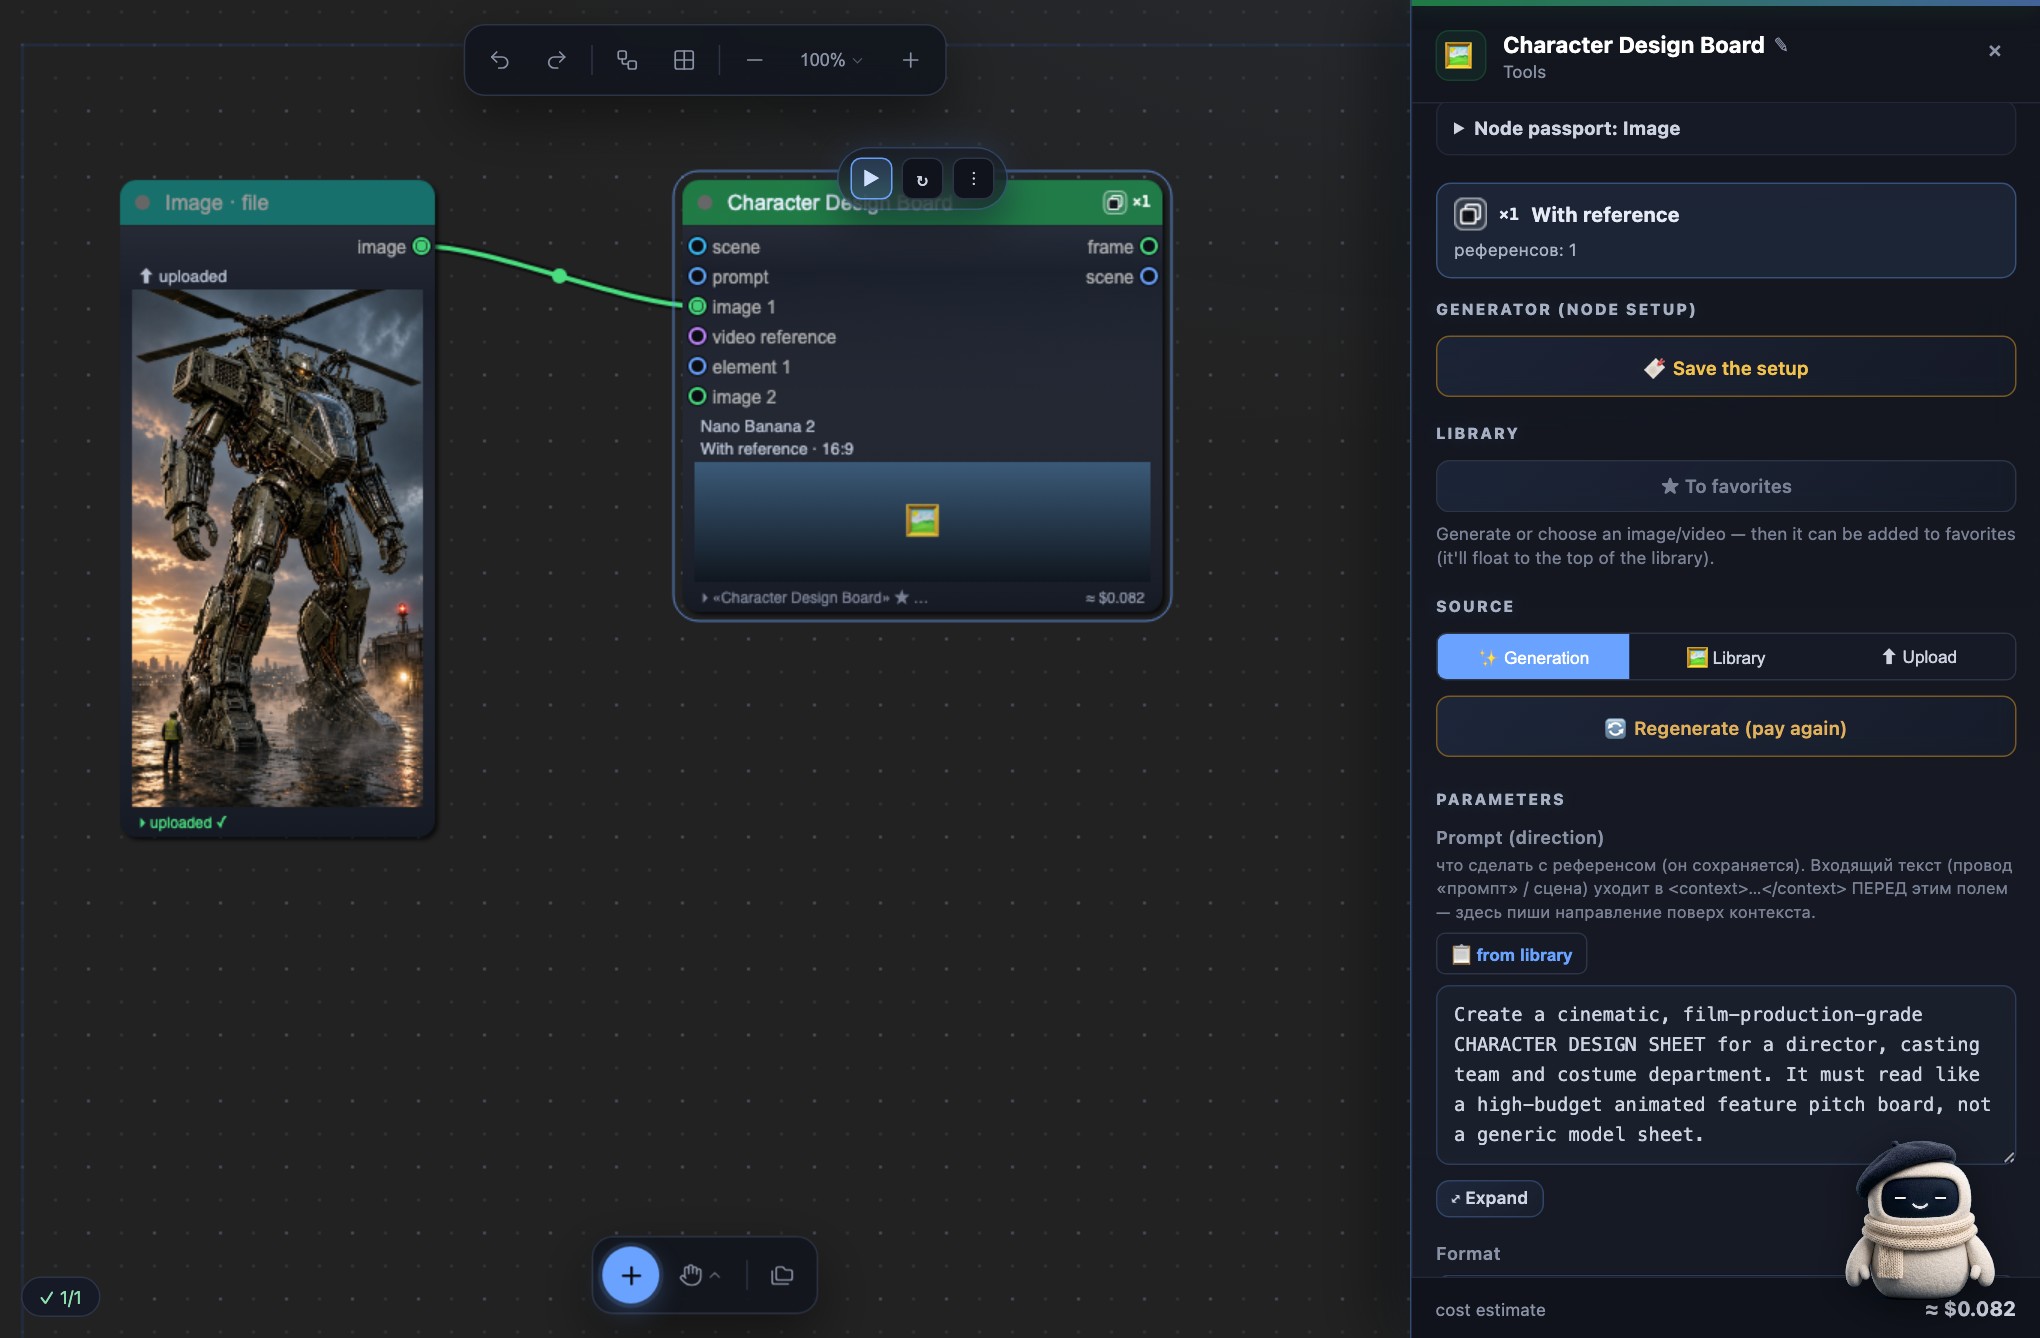
Select Character Design Board and click ▶ “Run up to this node” in the toolbar above the card. This is a paid generation; the studio shows the cost before you run it. Wait for the sheet, then check that every view has the same face, proportions and outfit. For another version, click ↻ “Regenerate (ignore cache)” — a new paid generation. Pressing ▶ again with unchanged settings reuses the existing result.
4. Create an Element and save the character
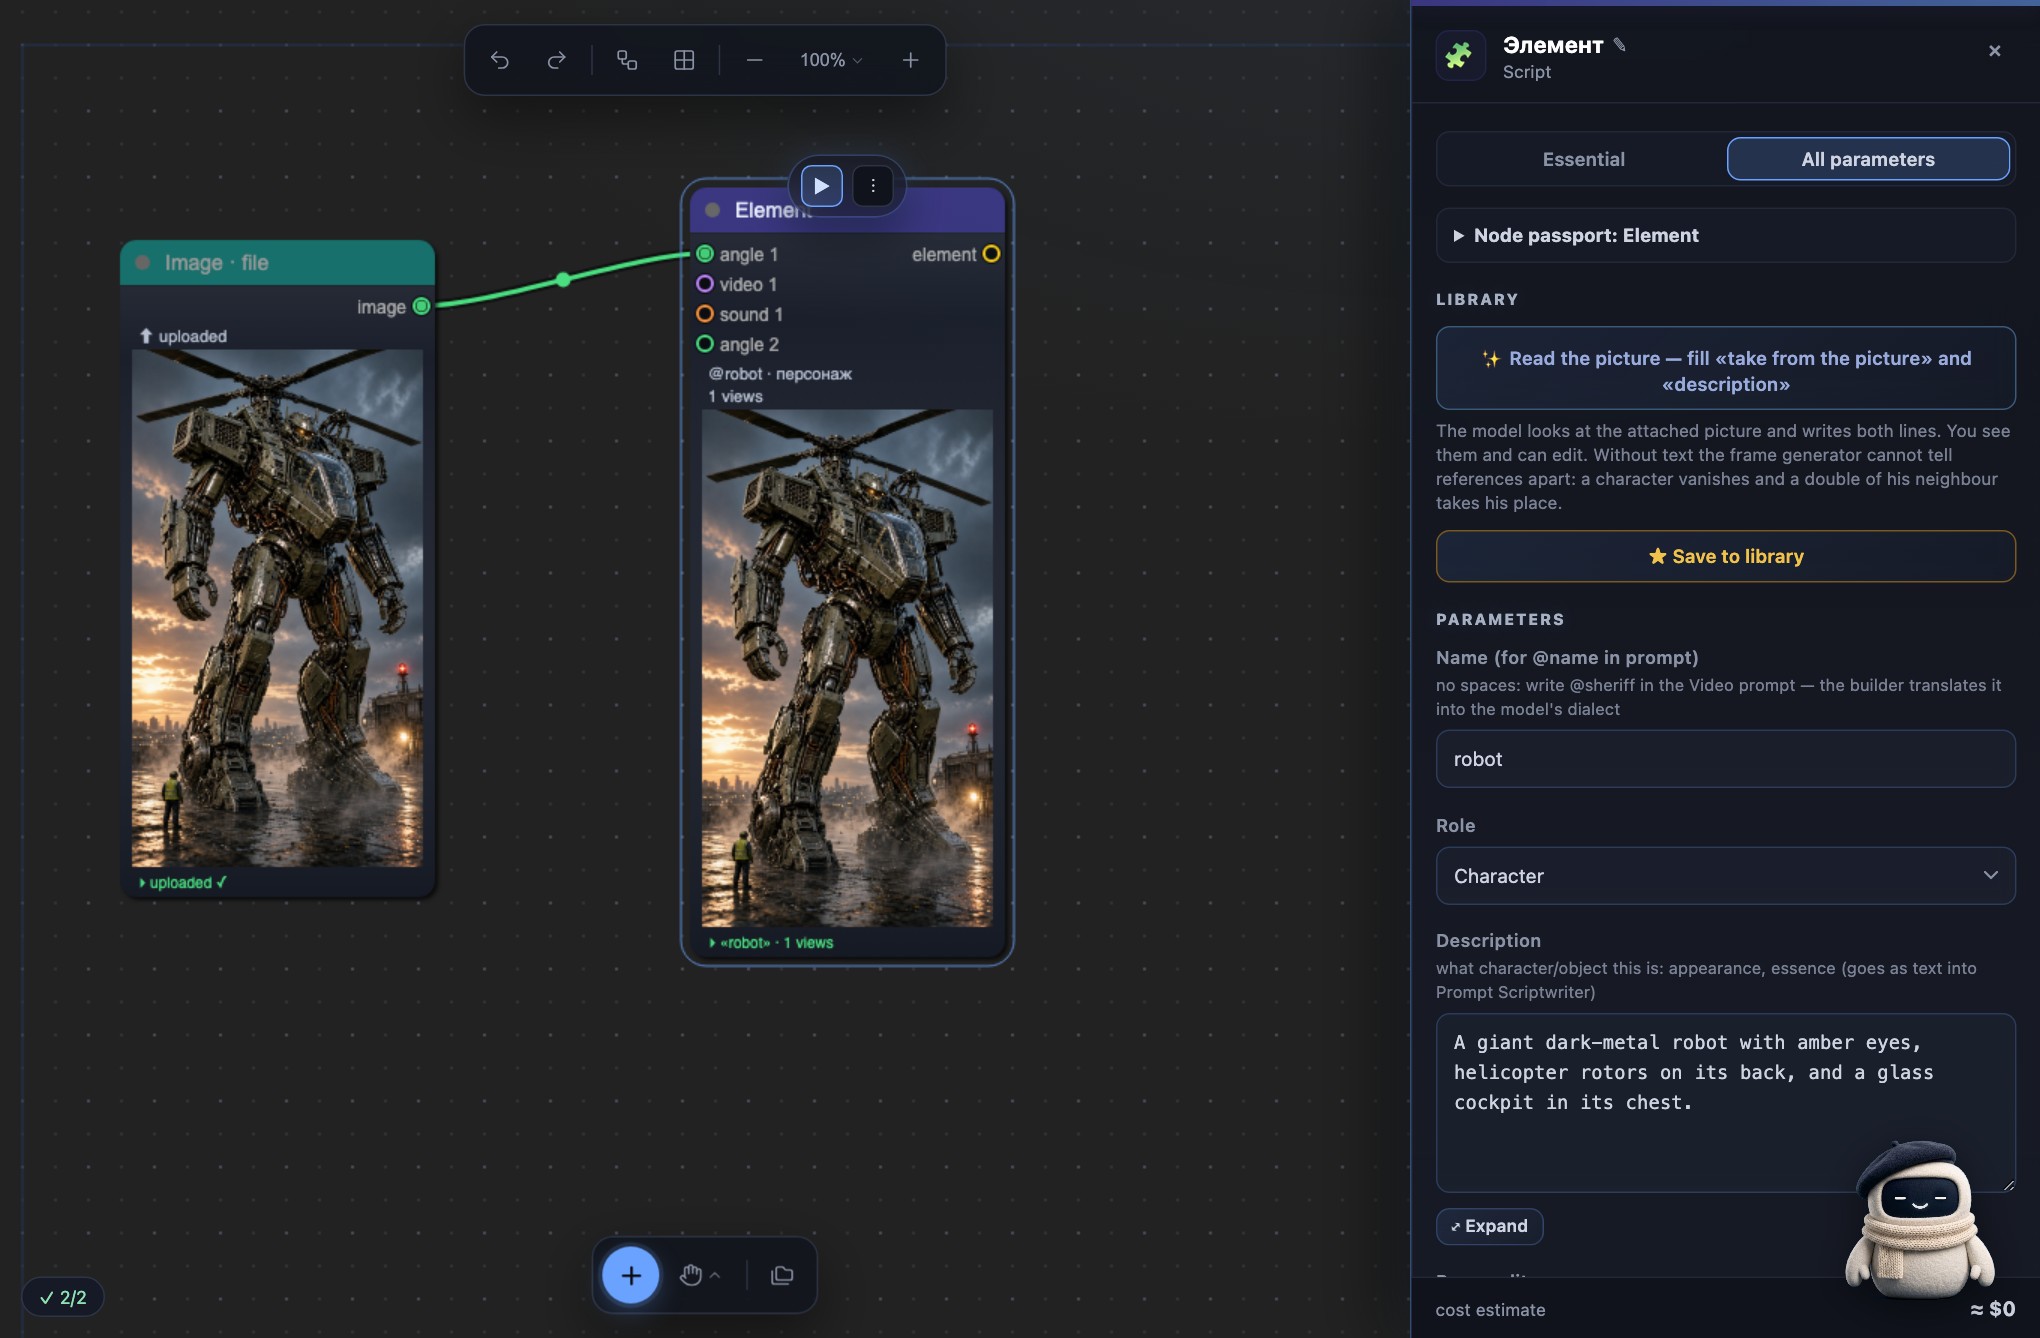
Click “+”, find “Element” and add it. Connect the completed Design Board’s “frame” output to the Element’s “angle 1” input. If you took the shortcut with an existing file, connect that file’s “image” output to the same “angle 1” input.
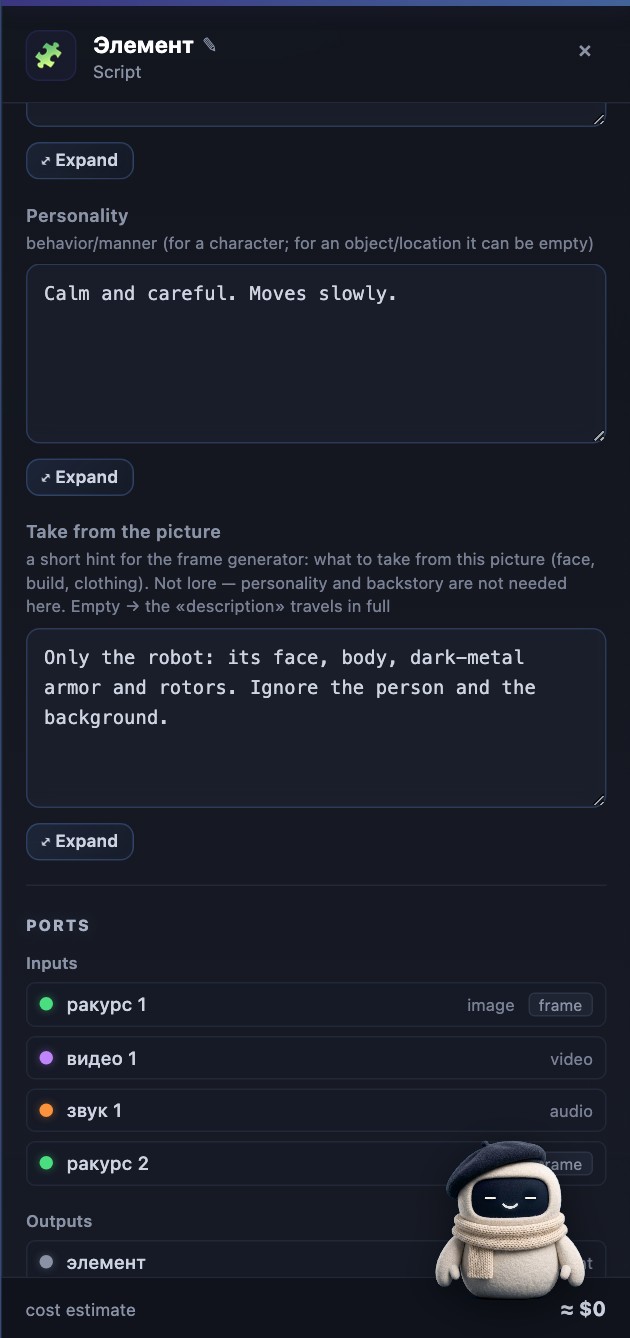
Select the Element and switch the right panel to “All parameters”. Give it a name without spaces, such as robot, and choose the “character” role. In “Take from the picture”, describe the visible traits to preserve. “description” and “personality” can hold details for the scriptwriter.
You can fill the fields in manually or use the image recognition button above “Save to library”. It suggests text for the reference and description; review and edit it before saving.
Only the robot: its face, body, dark-metal armor and rotors. Ignore the person and the background.
In the same panel, click “★ Save to library”. A saved indicator should appear. You do not need to run the Element separately to save a finished image. If the button is missing, check “All parameters”; if it is disabled, check that a ready result is connected.
5. Create a new scene with your character
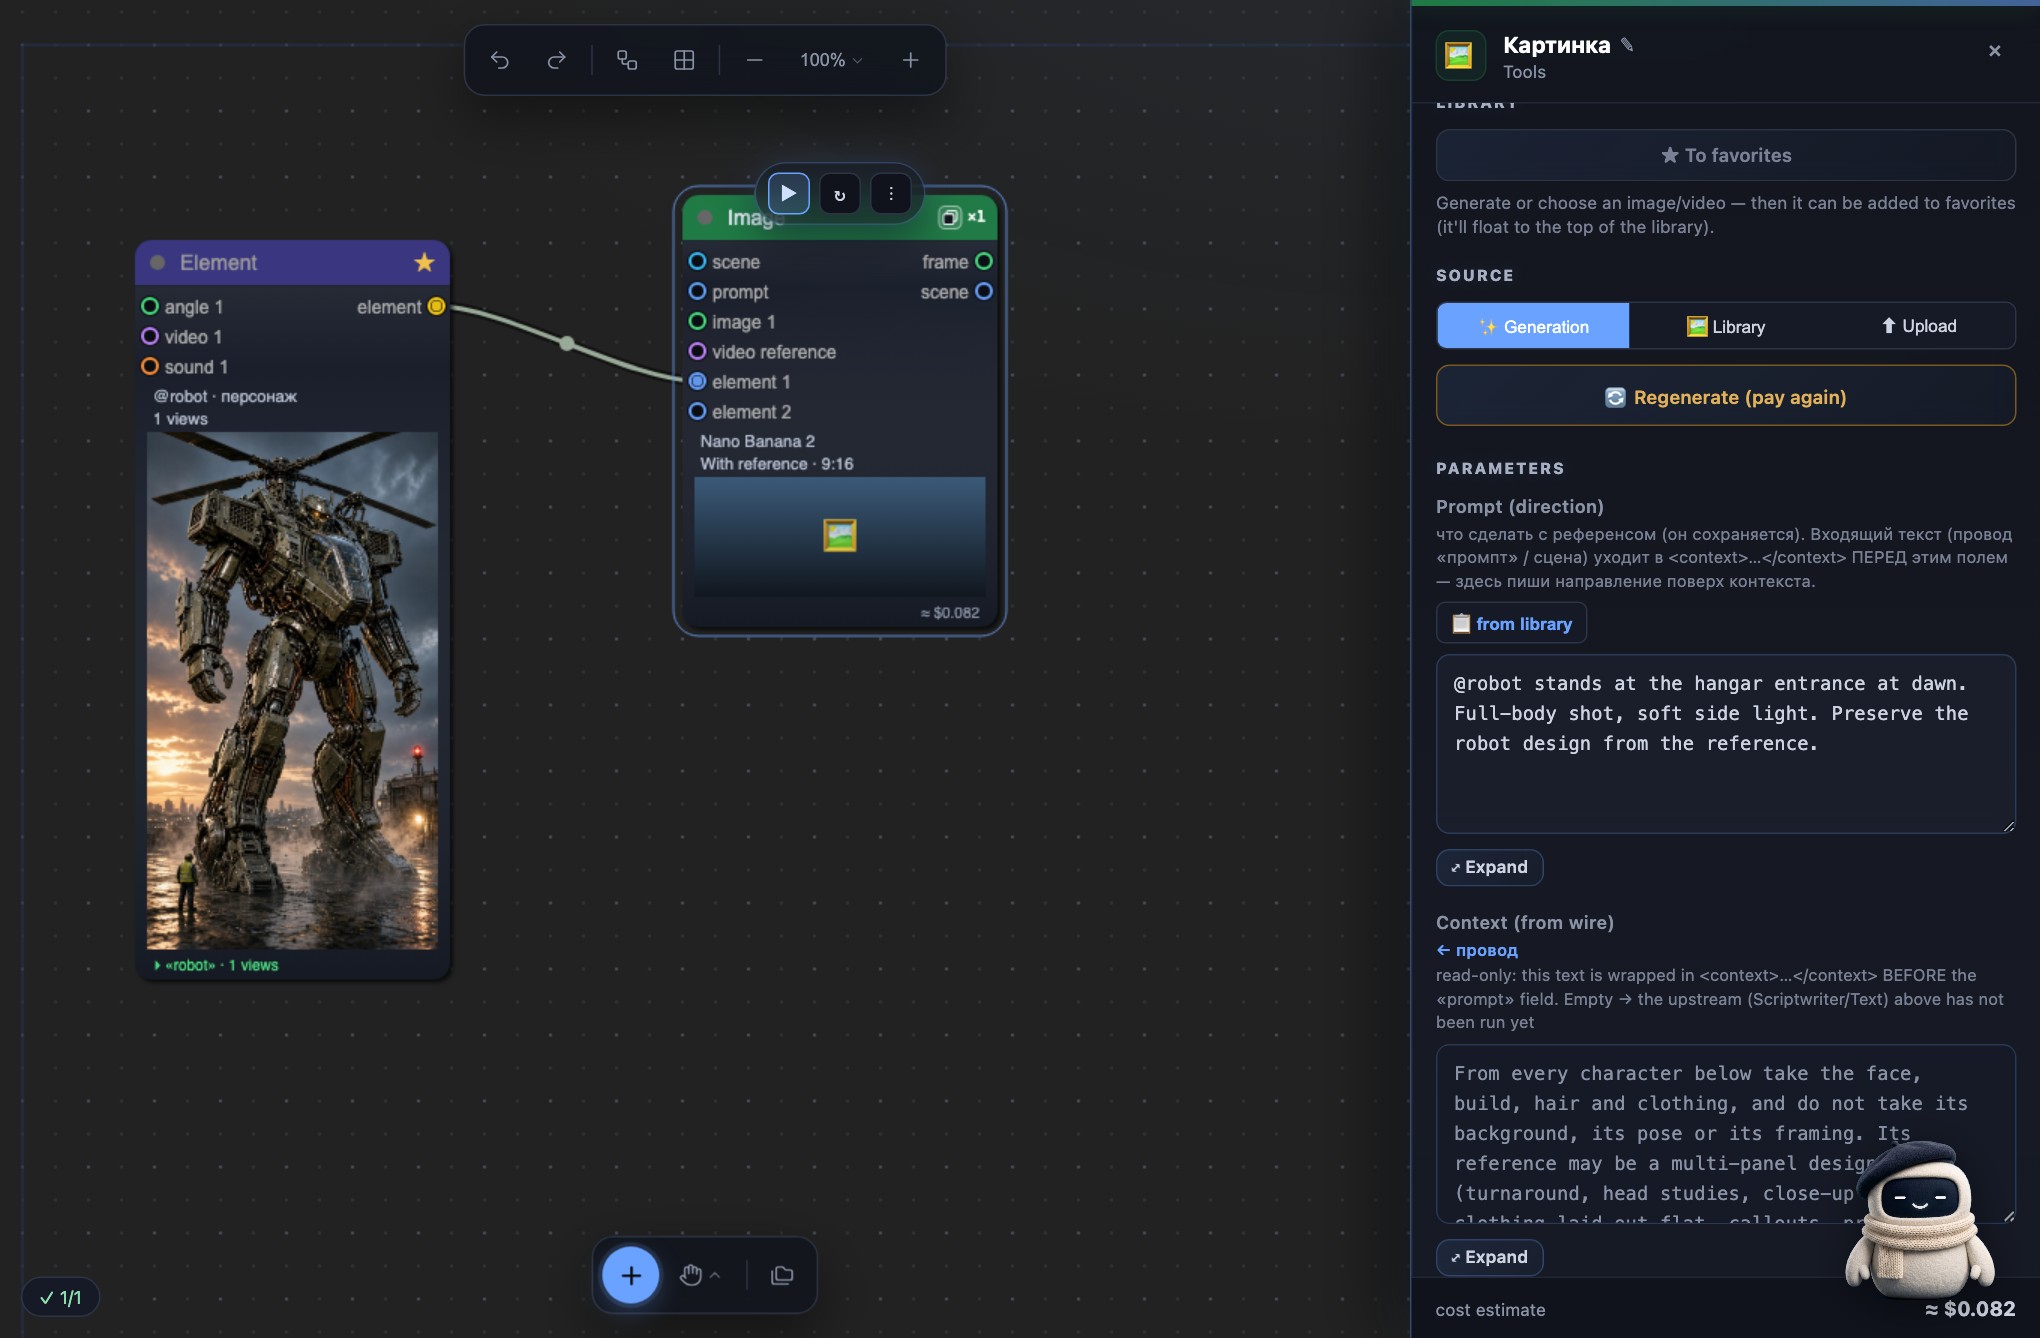
Use “+” to add a new “Image” node. Connect your character’s “element” output to its “element 1” input. In “prompt (direction)”, describe one scene and refer to @robot — the name must match your Element.
@robot stands at the hangar entrance at dawn. Full-body shot, soft side light. Preserve the robot design from the reference.
Keep a model that supports references, such as Nano Banana 2, and “auto” mode. Choose the scene format: 9:16 for a vertical video. Select “Image”, click ▶ and check the character’s face, details and colours. For the next scene, add another “Image” and connect the same Element.
Once you like the frame, add “Video” and connect this “Image” node’s “frame” output to “first frame”. Fill in “Motion prompt (direction)”, choose the duration and click ▶ on “Video”. Keep the multi-view Design Board sheet as a reference in the Element: the video’s first frame should be the completed scene.
6. Bring the character into your next episode
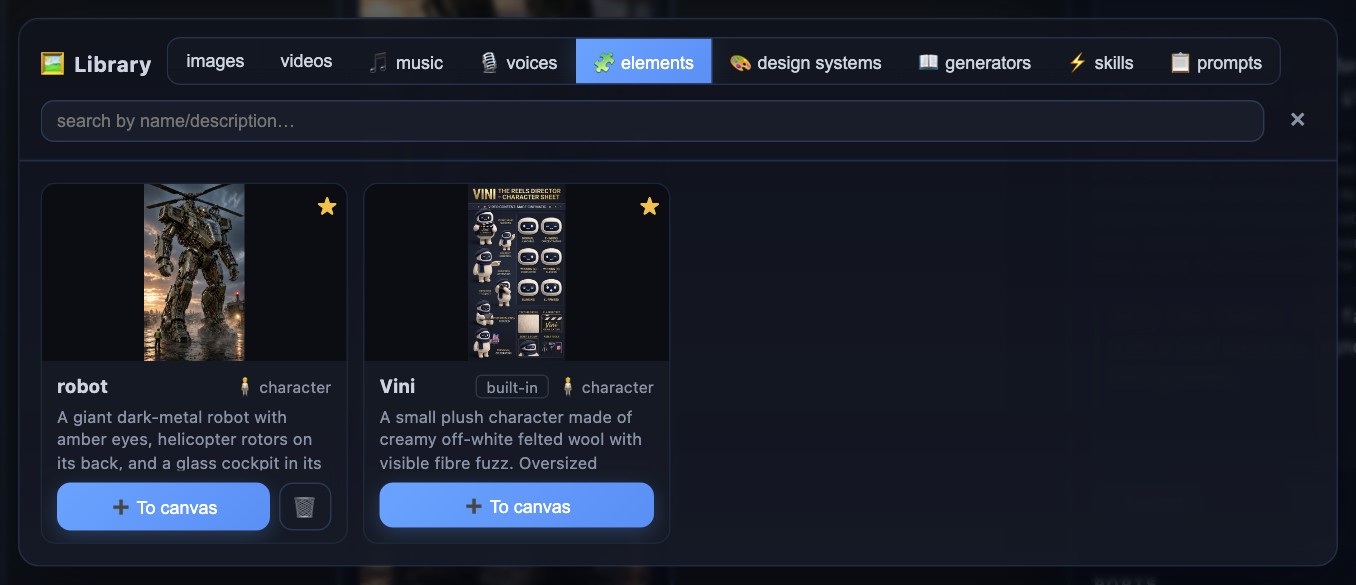
In another project, open “Library” → “elements”, find robot and click “To canvas”. Elements are available across your projects. If the character is missing, return to the original Element and check its saved indicator. Connect the restored Element to a new “Image” node’s “element 1” input, as in step 5.
What if AI writes the script?
Connect the same “element” output to “element 1” on “Prompt Scriptwriter”. The scriptwriter receives the character’s name, role, description and personality. Describe the story; you do not need to write internal tags yourself.
Continue with: the Element library · several characters in one scene.
Build your own hero in Vini Studio
A cloud AI video generator: from an idea in words to a finished clip with sound, 9:16 or 16:9. The project is in closed beta — I am looking for authors and partners.
Get started in the studio →Sign in with Telegram or Google. No account needed in advance — it is created for you.